How to Make Maple Syrup
Pure maple syrup is easy and fun to make. Boiled down, the maple syrup recipe is quite simple (pun intended)!
On average, maple sap is 98% water and 2% sugar content. These ratios can change from year to year and from tree to tree. Sugarmakers boil the maple sap, evaporating the water, to leave behind concentrated and tasty maple syrup.
Almost all of the world’s production of maple syrup comes from Canada and the United States.
You don’t need to live near a forest to make maple syrup. All you need to get started is a single maple tree and heat source that you would use to boil sap. Yup—the beginner process is almost the same as if you were to boil a pot of water.
This article is geared to beginners who want to learn how to make maple syrup for the first time. You won’t need a lot of fancy equipment. You can get started and make sure you enjoy the hobby.
Almost everyone I meet gets hooked on making maple syrup and continues to expand their knowledge of the processes.
Trust me, you’ll soon be hooked, looking to build your own sugarhouse and manage your own sugarbush. I know, because that’s what happened to me.
A word of caution—there’s a tradeoff between equipment and manual labor. This tradeoff becomes more apparent as you increase the number of maple taps that you manage.
You won’t have to worry about that now. We introduce the operations production concept for craft sugarmakers.
Until then, follow these steps to get started making your own real maple syrup at home.
Homemade Maple Syrup
Your own maple syrup is a perfect companion to french toast, waffles, and pancakes, and more. Homemade maple syrup is even healthy for you (in moderation of course!).
You can use maple syrup when baking too. Maple syrup is a healthy replacement for white sugar or other artificial sugars.
There are a lot of recipes online for combining brown sugar or granulated sugar, maple extract, honey, water, and maple flavor into a pancake syrup. While this may be a quick and easy way to create something maple-flavored, it doesn’t stack up to the taste and health benefits of real maple syrup.
Don’t be mistaken that pancake syrup made with high fructose corn syrup is the same thing as real maple syrup. It’s not, and legally can’t be called maple syrup (that’s why they use the name pancake syrup).
Maple syrup making is a fun way to spend time outdoors and create tasty traditions with your family.
Identifying Maple Trees
The best maple tree for making syrup is the sugar maple tree. It has the most sugar content of any maple tree. Red maple trees are the second-highest in sugar production.
Many factors influence the sugar content of maple sap. We could spend hours talking about how environmental factors, tree crown shape, soil, seed production, and insects affect sap production.
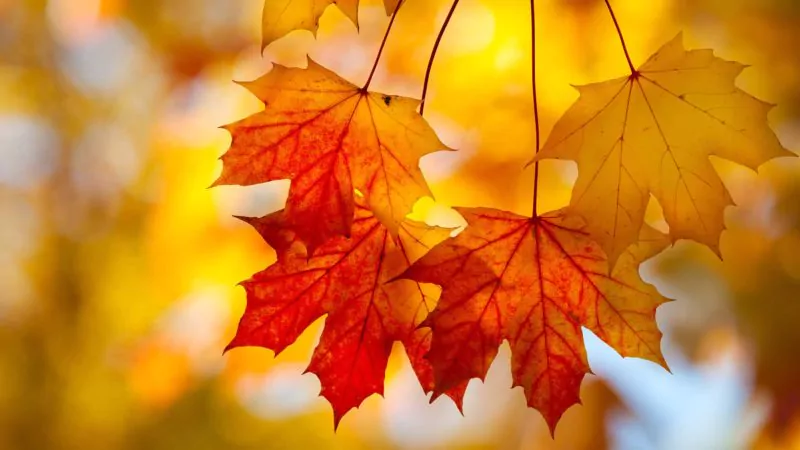
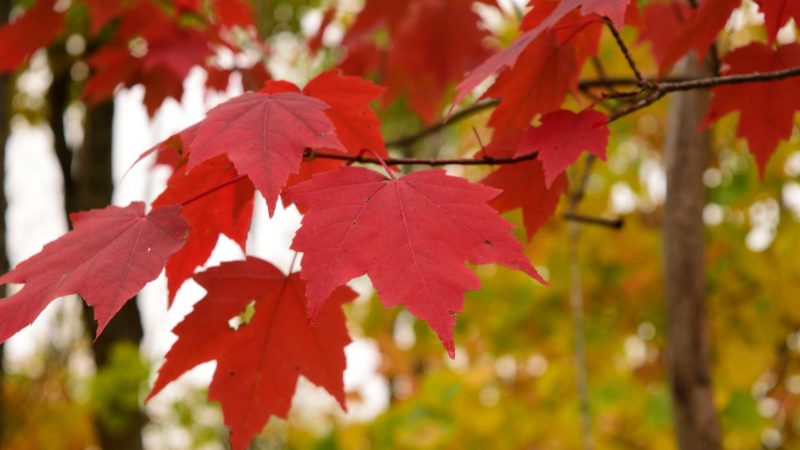
It’s much easier to identify maple trees during the fall when leaves are on the trees.
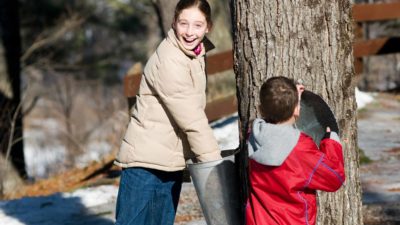
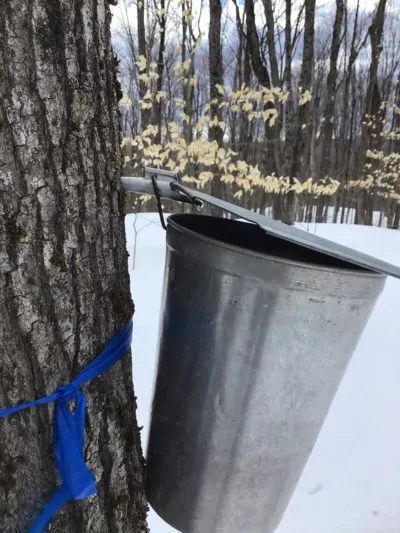
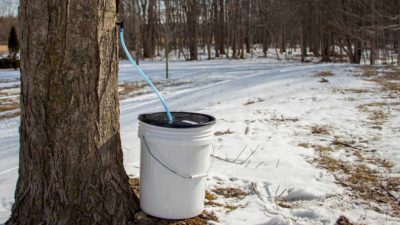
Use blue flagging tape to mark and identify the tree (or trees) you’d like to tap. Place the marking tape at least three or feet high on the trunk—higher if you live in an area with lots of snow.
Maple Syrup Season
The maple season starts and stops due to weather. You can’t mark a day on your calendar to start.
Maple sap begins to run when the daytime temperatures are above freezing and the nighttime temperatures remain below freezing.
You don’t need to tap the first day the weather warms above freezing. You can tap anytime for several weeks, though you will miss out on sap and ultimately syrup if you wait.
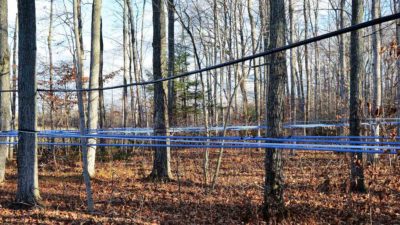
Tubing systems allow you to tap in advance of the start of maple season. Sugarmakers with tubing systems tap early to ensure they don’t miss out on the first few days sap begins to run.
Members Only: Preplanning Tubing Saves You Time Installing
There’s no particular height at which to tap. It’s important to make sure that it’s easy to reach to collect that sap.
If you live in a place with a lot of snow, like Vermont, you might be standing on a high snowpack when you tap. Come spring when the snow melts, you might be standing a few feet lower on the ground when it comes time to remove the tap.
As a rule of thumb, sap harvested early in the maple season will yield a light-color maple syrup. As the season progresses the syrup produced from the sap darkens.
The syrup will also darken depending on the amount of time you store sap before boiling it into syrup.
As the days and nights become warmer, the maple tree buds will start to swell, ready to burst open. Maple trees create chemical changes to the sap to trigger leaf budding. Sap collected at the end of the season often has a “buddy” taste to it.
We know the season is over when the sap tastes buddy or the maple sap stops running.
Tapping Maple Trees
Most maples are ready for tapping when they are thirty to forty years old. It’s hard to tell the age of a tree without counting its rings, so remember to pick trees to tap that meet the 10″-12” diameter minimum.
Tap only healthy maple trees. Done properly, tapping shouldn’t hurt the tree. A healthy maple tree can provide sap for 50 – 100 years.
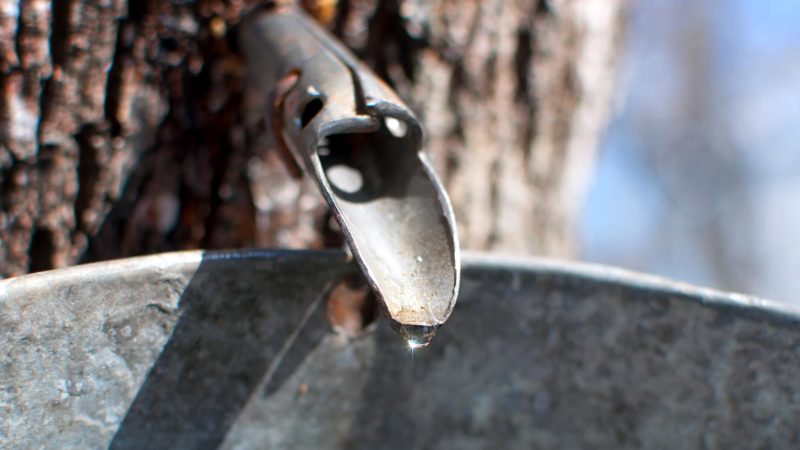
Use a 5/16 drill bit to create the tap hole and drill to a depth of one and a half inches. You can use 5/16 tubing to create a depth guide for the drill bit.
Take care when drilling the tap hole to cleanly enter and exit the tree. Don’t wiggle the drill or drill bit and create oval holes.
More Info: How to Tap A Maple Tree
Collecting Sap
Depending on the size of your maple tree and weather conditions, you might be able to collect a few gallons of sap a day.

You don’t need to wait until you have forty gallons of sap to start boiling. It takes a lot of time to boil forty gallons of sap into one gallon of syrup.
Maple sap is a clear sweet liquid that looks a lot like water. In fact, it’s usually 97 to 99% water.
A sap hydrometer can be used to determine the sugar content of your maple sap. Sugarmakers track this number from year to year.
A few percentage points change really affects the amount of water that must be evaporated to make maple syrup. Knowing the sugar content will tell you how much time it is going to take to boil your maple sap.
It’s really important to use your maple sap soon after you collect it, as maple sap is perishable.
While it’s ideal to boil sap daily, it might be difficult to do so based on your schedule and the amount of sap collected. Don’t worry, you can store your maple sap for up to a week.
Warm weather during the end of the maple syrup season can cause the sap to spoil.
Always store your collected maple sap in sealed food-grade containers located on the shady side of your sugarhouse or outbuildings. If available, you can pile snow around the storage container.
Maple sap and syrup attract the flavors of previous items stored in the containers you use. Don’t use pickle buckets from your local deli. Or construction buckets. A best practice is to use only food-grade buckets to store your sap.
As you increase the number of taps you manage, transporting sap becomes a challenge. That’s when tubing systems improve operational efficiency because they transport the sap via gravity or vacuum from the maple trees to the collection site or the sugarhouse.
Boiling Maple Sap
Maple sap is mostly water with some sugar content in it. Boiling the sap is a simple process—although slightly different than boiling water in a large pot.
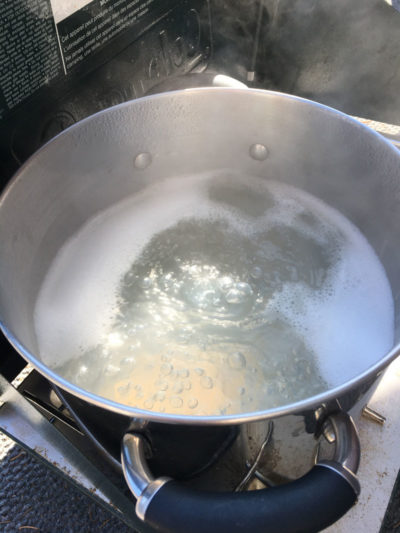
Maple sap will start to boil near 210 degrees Fahrenheit. It will continue to boil at this temperature until the maple sap starts to thicken into a syrup.
The temperature rises as the sap thickens and starts turning to maple syrup. Use the temperature as a gauge to monitor progress—not to determine that you’re finished boiling.
Once the correct amount of water has evaporated, you will have what’s called “finished maple syrup”.
It’s really important to note that the final temperature of finished maple syrup will change depending on the weather, elevation, and time of day due to barometric pressure. The proper way to finish maple syrup is to measure density (thickness). Don’t count on temperature.
You can use a candy thermometer and a syrup hydrometer to measure the progress of the concentration of the sap into syrup.
Don’t count on the thermometer to tell you when the maple syrup is finished. Count on your syrup hydrometer.
If you don’t have a syrup hydrometer, you can use a flat wooden spatula to measure the viscosity (sheeting) of the syrup from the spatula.
Finished maple syrup should run off the flat wooden spatula in a whole sheet. If it drips like water it’s too thin and is not finished.
Maple syrup that is bottled too thin won’t last and will be susceptible to mold.
When finished, maple syrup is about 67% concentrated sugars and 33% water.
The two most common methods for boiling maple sap are propane stoves or a small outdoor fireplace (also called a wood arch).
Another popular way to make maple syrup is to boil sap using a turkey fryer.
More often than not, you should boil sap outdoors. Boiling sap produces a tremendous amount of steam. Take caution when boiling sap inside your home to make sure you have a good stovetop exhaust fan.
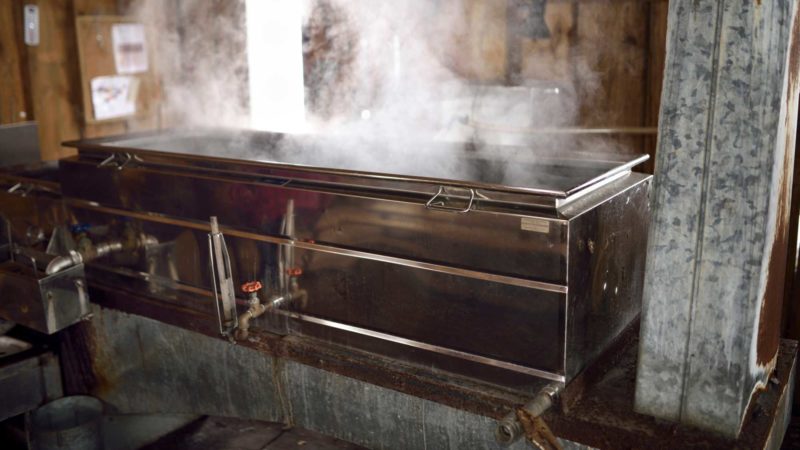
An evaporator is a device that combines a fire source and pans for evaporating sap. Evaporators work more efficiently than turkey fryers or propane stoves because they concentrate the heat from the fire source on the bottom of the pan.
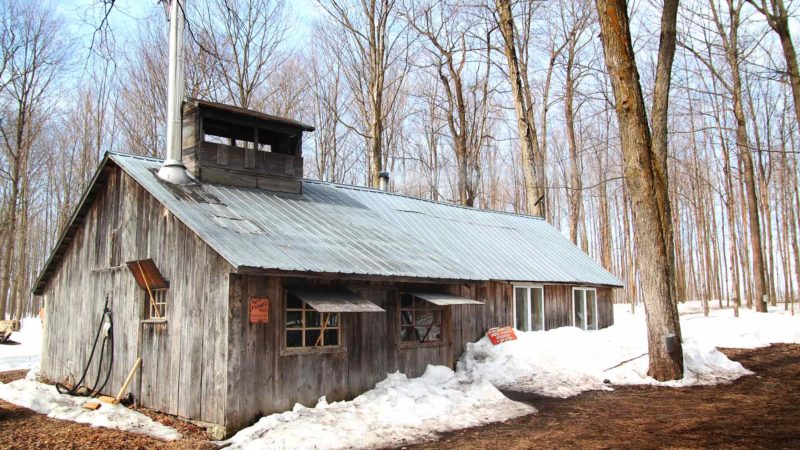
Most sugarmakers purchase a professional evaporator to save them time during the boiling process. They then store and use these evaporators in specially designed buildings called sugar houses.
Bottling Maple Syrup
Handling Hot Syrup
Your maple syrup should be between 180 degrees and 190 degrees Fahrenheit when bottling.
Filtering makes for a better presentation of maple syrup in the bottle but is not required.
Unfiltered maple syrup contains naturally occurring sediment that collects at the bottom of your container. It’s not harmful but could look unsightly.
You can use commercially available filters to remove the sediment. There are quite a few recommendations to use cheesecloth as a filter—but it’s too porous and won’t get the job done.
Mason jars are a great way to store smaller amounts of maple syrup. Fill the mason jars with hot maple syrup nearly to the top.
Just like the canning process for sauce, the maple syrup will begin to cool in the mason jars, and you’ll hear the lid “pop” down.
Commercially available glass makes a great presentation if you want to share your maple syrup with friends and family.
Storing Maple Syrup
Properly stored, pure maple syrup will last up to a year or two. Store your finished maple syrup in a cool dry place away from sunlight.